If you prefer to travel light without your bulky DSLR, you might still want to capture vacation memories with your smartphone camera. As a photographer, you might hesitate to part with your DSLR. You don’t wish to miss out on the chance of taking beautiful shots while you travel.
Why not travel with your smartphone and leave your bulky gear behind? It may seem outrageous, but you can get by with just a phone camera for travel photography. You can now use this little device to take stunning photos that appear as if they were taken using a DSLR.
We shared some tips for smartphone photography a while back. You’ve probably mastered some of the basic skills, such as lighting composition and unique perspectives. Now you can tackle the next step: taking professional-quality photos using your smartphone.
What you can do
Optimize the HDR mode

The HDR mode is available on most modern phones. A single HDR photo is created by combining 3 images taken with different exposures. When you click a picture in HDR, the phone takes three photos and combines them to create a single image. It’s very important that you keep the camera steady when using HDR mode.
The High Dynamic range allows you to have a wider brightness difference between your lightest and darkest points in the photo. HDR is especially useful when taking photos with a lot of contrast in the dark and bright areas. HDR is a great feature, but there are times when you should avoid using it. This is a summary of the situations when HDR should be used and avoided.
HDR mode is used when:
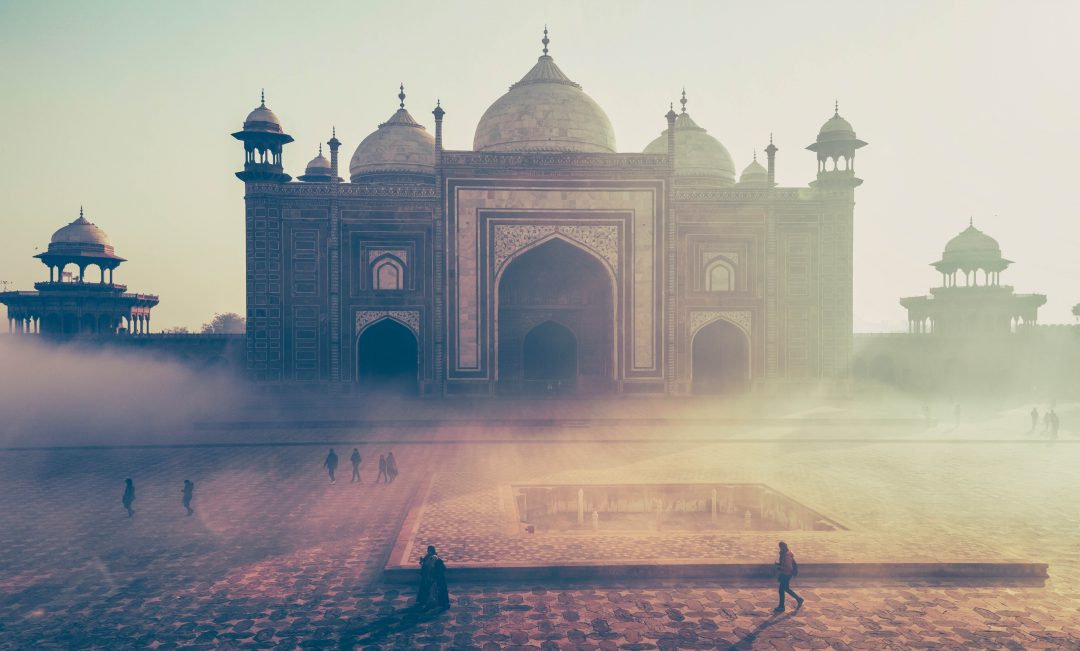
- Landscapes can be dark because of the stark contrast between the light sky and darker land. The sky will always appear in the background. HDR will allow you to contrast brightness so that the landscape isn’t too dark or the sky overexposed.
- You are shooting in direct sun – direct sunlight will make your subject appear brighter than it is, compared to the shadows around them. HDR balances well-lit areas and dark shadows in your photos
- HDR can brighten your foreground while not overexposing the background.
Do not use HDR mode if:
- HDR works best when you’re shooting subjects that are already vibrantly colored. HDR will make the colours appear unnatural.
- As explained above, HDR uses three pictures to create one image. Even a small movement can make the subject look ghostly and blurry.
- HDR will dull down contrast and result in a dull picture.
- If you shoot under very poor lighting conditions, HDR will compensate for the darkness, but it will result in an image that is not sharp and discoloured.

Download a camera application to improve your photography
Install third-party applications that give DSLR settings to your smartphone camera if you want more control. You can control the shutter speed, ISO and white balance manually. You can choose to use RAW, DNG, or change the lens (between 28mm and 56mm) depending on which app you are using.
You can find a variety of apps that are compatible with Android and iPhone. Start with Open Camera, DSLR Camera PRO, Manual, or Obscura Camera for Android, then try other apps to see what works for you.
For a better game, use clip-on lenses
Clip-on lenses can take your smartphone’s photography to a whole new level.
Be aware that clip-ons are much smaller than DSLR lenses. You can buy them in kits and choose from a wide-angle lens, a macro lens, or something fun, like a Fisheye Lens. You can’t choose which lens to use. You can bring them all. These are very light and take up little space.
Create depth with foreground in your photos
In a photograph, the grandness of a place and its architecture is often lost due to the two-dimensional nature of an image. Set layers with foregrounds and backgrounds to fix the problem. The most popular technique is to place an object at the forefront of your photograph to create a sense scale. This can be achieved by placing objects in the surrounding area, like flowers, rocks or boats.
Your foreground item should add to your story. The foreground object should blend into the scene so that it doesn’t distract.
Take the same photo in landscape and portrait format
You can experiment with the different angles by taking photos from both directions. You may not know what works for which shot until you have compared it.
Shoot in square format (1:1 aspect ratio). This limits your frame size. If you choose to shoot in 1:1 format, you can crop the image later.
Become familiar with the shutter lag
It is not noticeable when using your camera, but it can frustrate you when trying to catch a fleeting moment. You will need to practice to learn the exact shutter lag of your phone.
Capture a scene
The goal of travel photography is to capture the moment and tell the story through images. You can use other senses to help you find interesting things. Your camera only records what is visible with the eye, but your perception will be influenced by all five senses. Take photos of a musician who is playing beautiful music. Zoom in on his hand and instrument, as well as his facial expressions or outfit details. Take photos of the bakery window and get closer for close-ups of the bread.
Then, get close to the object to catch the fine details you can’t see from afar. For example, the pattern and colors of Moroccan rugs on the market, or the texture of food being sold by street vendors, can enhance the scene you captured in your previous photos. Don’t walk away before you stop and capture the moment. Combining wide-angle shots with close-ups will give you a good overall impression of the location.
Make your subject pop out by simplifying the photo
You can make your photograph stand out by removing the distracting elements that take the attention away from the main subject. You can achieve this by using a background that is uncluttered or by using negative space. Either of these options will make your photo simpler and the subject more prominent.
Make sure to master composition first.
Take a look back
We can be too focused on the scenery in front of our eyes, and miss out on the beauty behind us. Take time to turn around when you are walking in one direction. You will be able to view a location from an entirely new perspective.
Use Instagram to your advantage
Instagram can be a treasure trove of useful information for travelers and shutterbugs. Geotags and hashtags can be used to discover your destination and its points of interest. They also help you find the best spots for taking photos. These features can help you learn what angles or perspectives work best in certain places and how to make them better. You can get an inspiration by looking at the pictures that other people have taken.
Prepare your phone accessories for use when necessary
The camera on your phone may be excellent, but it can also have its own disadvantages. Smartphone photographers face a variety of problems, including a short battery life or brittle phones. Do not let this hinder your travel photography. Bring your smartphone with a high-quality screen protector and case, a portable charger and a battery, as well as a waterproof cover if needed.
Keep it Natural
It’s easy to overdo the editing, but unfortunately many people do. These edited photos look worse because they have been over-saturated, contrasted, or blurred.
If necessary, edit the photo to make it look more natural. It can be very tempting to use bokeh effects in order blur out the background, but this often results in photos that look more fake than real. Remember that you are enhancing your photo, not altering it.